- Azure Log Analytics and Azure Automation
Many Azure customers continue to own on premises machines, and that won’t change anytime soon. However, some customers still want to take advantage of Azure Log Analytics and Azure Automation. The following use cases are available when you install the Microsoft Monitoring Agent on your on premises machines.
- Collecting the event logs and evaluating the events, for example with Azure Monitor.
- Activation of Azure Update Management (Azure Automation Solution). With this solution you can ensure the update compliance of your servers and you can have the machines updated by an update plan.
- Enabling Azure State Configuration (DSC). This feature allows you to apply Desired State Configuration to your on premises machines.
- Use Azure Sentinel as a SIEM “Security information and Event Management” for on premises log analysis.
Agenten deployment
How can the agents be distributed?
- Of course the agents can be installed manually!
- Microsoft provides a DSC profile which can distribute the monitoring agent to the on premises machines via “State configuration”.
- My solution: The distribution via Active Directory group policy.
Manual deployment
Manual deployment is in my view a solution for a few test machines but not for a deployment of very many machines.
Desired State Configuration Deployment
The Azure Automation desired state configuration deployment works well and I have successfully deployed with it for some customers. However, if the customer does not plan to use Azure Automation desired state configuration further, for example for the distribution of other configurations, then I would no longer recommend this type.
Background: It happens several times that the communication between the DSC client and Azure is interrupted and the client can no longer communicate. The effort to fix this error is to be underestimated, especially for administrators who do not do this every day and especially if you have never done anything with the “Desired State configuration”.
Active Directory grouppolicy deployment
If you are planning to deploy Microsoft Monitoring and, if applicable, Dependency Agent to your on premises machines, then I recommend deploying via Active Directory Group Policy. In this article I describe the deployment via this way and what you need for it.
Background
You will need some information from Azure to deploy the Microsoft Monitoring Agent, it is as follows:
- Azure Tenant
- Tenant ID
- At least the ownership of a subscription so you can create the resources.
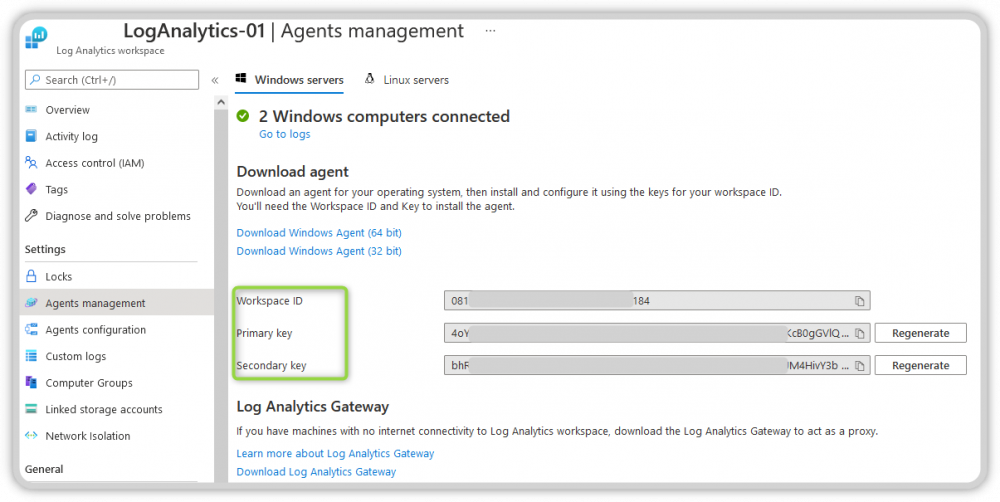
- Log Analytics Workspace ID and the Workspace Key.
- You can get the Workspace ID and Key when you open the Log Analytics Workspace and open Agent management, see image.
Permission in Active Directory
You need the following permissions in the local Active Directory to complete the configuration:
- Create group policies
- Permissions on a file server to create a share or in the domain netlogon directory, to create folders.
- Permissions on a server as an admin to test the deployment.
Procedure
Create a directory on a file server or in the netlogon of your domain. You must ensure that all Authenticated Users “Computer” have read permissions.
Use the UpdateAgentsSource.ps1 file for:
- downloading the Microsoft Monitoring Agent and
- Optional: download of the Microsoft Dependency Agent
- Inserting the GPODeployMonitoring.ps1 file into the folder created under point 1
- Create a new group policy
- Delegation of permissions for the scope of this group policy and import the settings
- Customize the group policy to your settings
Note: In the following I describe each task in a separate paragraph.
Create source directory
You need a base directory that contains the installation data used in the Deployment Script group policy. I like to use the domain’s Netlogon share for this because a) this data is replicated to all Active Directory locations and b) all clients have read access and c) the size of the files is manageable.
Tip: If you decide that you want to use a directory on a file server, make sure that the computer accounts have read access here.
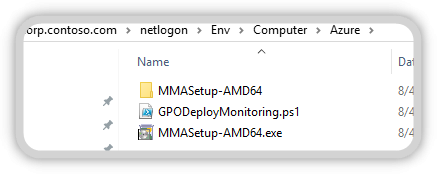
The directory I use by default is the following: \\DomainFQDN\NETLOGON\ENV\Computer\Azure\. This directory will later be used to provide all the data needed for the deployment.
Please download the desired agents and place them in the directory mentioned above.
You do not need the Dependency Agent for the start yet, this can be activated later.
Tip: Information about Dependency Agent
Overview of this directory
The directory should look like this after preparation.
Using UpdateAgentsSource.ps1
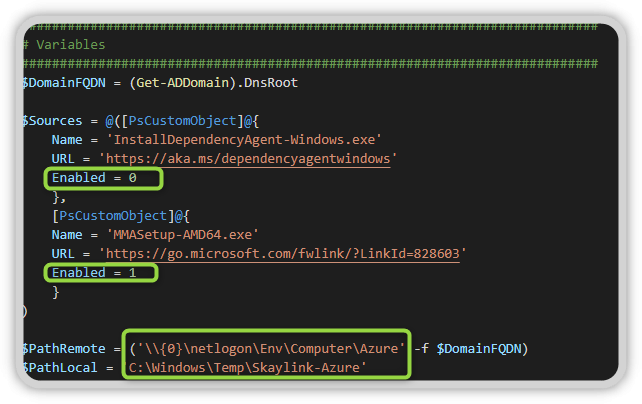
Alternatively, you can use my PowerShell script to deploy the installation file. This script downloads the agents and unpacks the monitoring agent in the target directory.
Note: In this file, you must adjust the following lines, if you want to use a different directory, for example, or if you want to use the Dependency Agent directly at startup.
Note: If you do not want to use Windows Update Services to update the Monitoring Agent, then you can run this script in a Scheduled Task on a regular basis.
Running the Scripts
The script does not require any parameters for execution and loads the agents you have activated for you and saves them in the target directory. In addition, the Microsoft Monitoring Agent is unpacked and also saved in the target directory.

GPODeployMonitoring.ps1
Then download from my Github repository the file GPODeployMonitoring.ps1 and place this file in the directory as well.
Grouppolicy
In my projects I often have different configurations for different departments, because in large companies often different administrators are responsible for the servers. This requirement has resulted in a group policy that allows you to configure the monitoring agent per department.
Note: Remember to limit the scope to which this group policy will apply. When you create a new group policy, by default the Authenticated Users are allowed to apply the policy. Reduce the scope to, for example, an Active Directory group of which your servers are members and remove the right for Authenticated Users to adopt the policy.
The group policy contains the workspace ID and key and the additional information used for distribution.
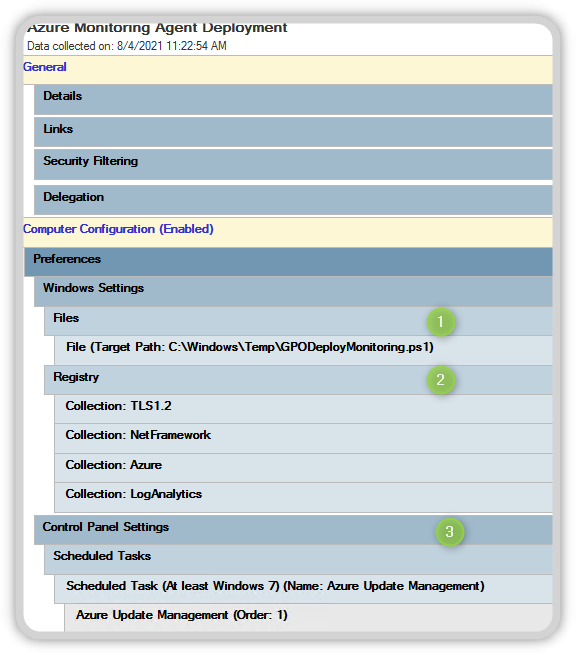
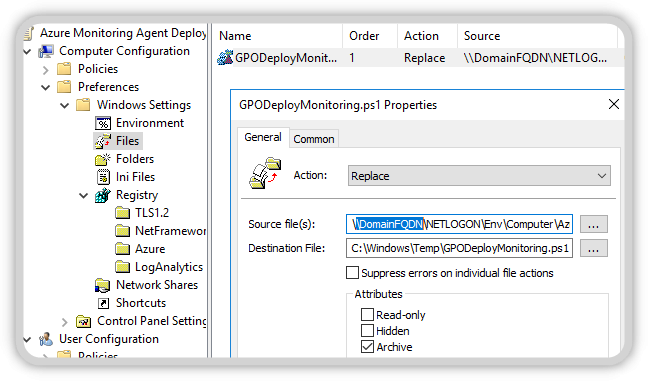
As you can see in the image, files, registry settings and a Scheduled Task are configured. You create a new Group Policy in your Active Directory and import the Group Policy from my Github repository. After you import the group policy, you edit the following settings:
- Source directory of the PowerShell file
- The Azure Registry Values
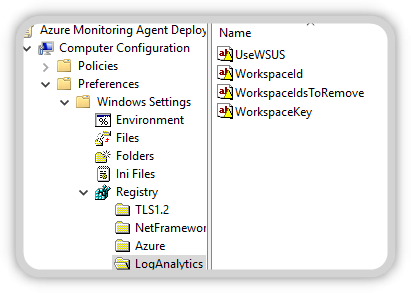
- The Azure and LogAnalytics registry values
- If you are using a proxy server on the network, then these registry values as well.
Adjust the source directory in the computer settings to your needs.
Customize Azure and Log Analytics Registry settings according to your needs.
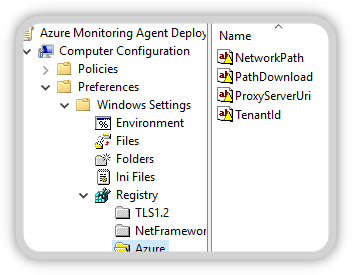
| Konfiguration | Value |
|---|---|
| NetworkPath | \\corp.contoso.com\NETLOGON\Env\Computer\Azure |
| PathDownload | C:\Windows\Temp |
| ProxyServerUri | OptionalIf you want to use a proxy then please enter the proxy server url here.Beispiel:proxy.corp.contoso.com:8080 |
| TenantID | Tenant ID from your Azure Tenants |
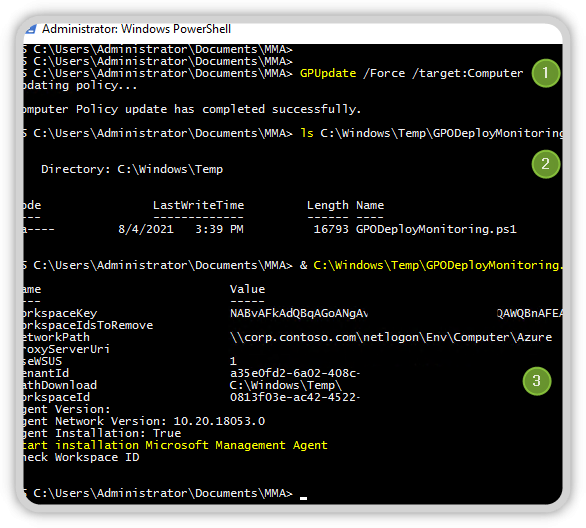
Once you have made these settings and assigned the group policy to a test client/server, then you can run the first test. Log in to the machine and run GPUpdate /force /Target:Computer, after execution the file GPODeployMonitoring.ps1 should be available in your C:\Windows\Temp directory.
Note: If you can only execute PowerShell files if they are signed, then you must have this PowerShell script signed before.
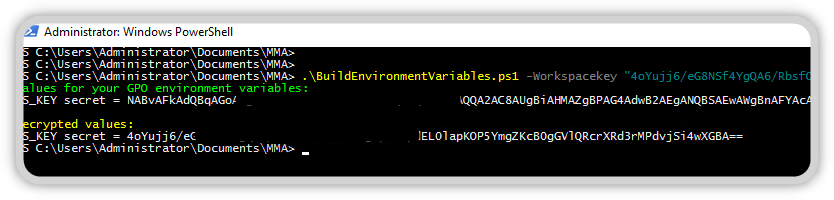
Then execute the following command:
& C:\Windows\Temp\GPODeployMonitoring.ps1
This script should now read the registry values and if all required values are present, start the installation as shown in the picture.
If everything went through successfully, you should now see the new Microsoft Monitoring Agent in the Control Panel under System and Security. You should now make sure that the agent is connected, as you can see from the green check mark in the Status field.

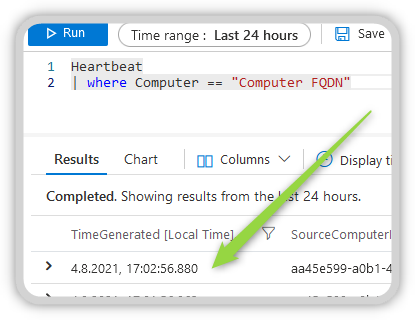
With a query in Azure Log Analytics, you can verify that the client/server is now successfully reporting to the workspace. Please note that the data in Log Analytics is not displayed in real time, give the system about 5 minutes.
Now you can take a cup of coffee 🙂
Agent Deployment for Azure VMs
This way of deployment for the monitoring agent works only for on premises machines. If you are using machines hosted in Azure as a VM, you will need to do this in a different way.
How to deploy these agents is described in the following article at Microsoft.
Log Analytics virtual machine extension for Windows – Azure Virtual Machines | Microsoft Docs
Have fun and enjoy Azure