Azure AD Connect
The Azure Active Directory Connect synchronization services (Azure AD Connect sync) is the main component of Azure AD Connect. It takes care of all the operations that are related to synchronizing identity data between your on-premises environment and Azure AD.
Azure AD Connect sync is the successor of DirSync, Azure AD Sync, and Forefront Identity Manager with the Azure Active Directory Connector configured.
Azure AD Connect sync builds upon a solid meta-directory synchronization platform. The following sections introduce the concepts for meta-directory synchronization. Building upon MIIS, ILM, and FIM, the Azure Active Directory Sync Services provides the next platform for connecting to data sources, synchronizing data between data sources, as well as the provisioning and de-provisioning of identities.
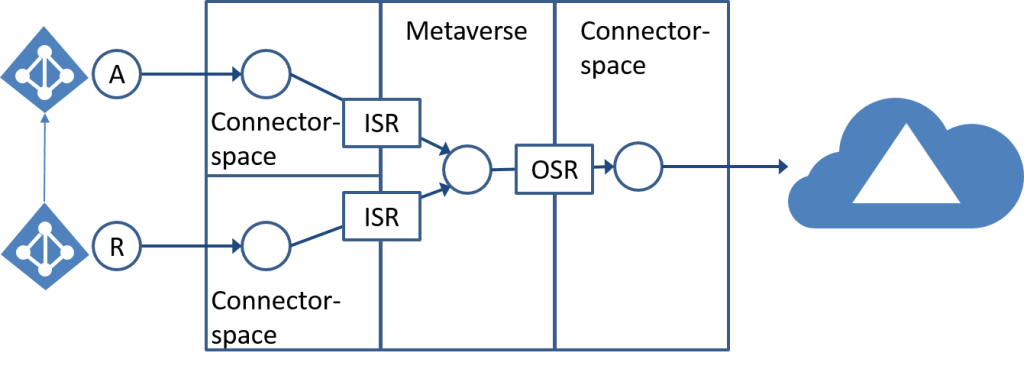
The following sections provide more details about the following aspects of the FIM Synchronization Service:
- Connector
- Attribute flow
- Connector space
- Metaverse
- Provisioning
Select the right Server and security level
Depending on the selected function of the Azure Active Directory connect “AAD Connect”, it must be secured accordingly. When selecting Password Hash synchronization, the security is the same as a domain controller, because the user that is used for synchronization has permission to synchronize the entire domain.
Important: The Azure AD Connect server contains critical identity data and should be treated as a Tier 0 component as documented in the Active Directory administrative tier model
Source:
Understand and customize synchronization
Technical Concepts
TLS1.2
To ensure that the AzureAD Connect service talks over TLS1.2 configure .Net Framework to use TLS1.2 with the following Registry patch.
Windows Registry Editor Version 5.00

[HKEY_LOCAL_MACHINE\SYSTEM\CurrentControlSet\Control\SecurityProviders\SCHANNEL\Protocols\TLS 1.2\Client]
"DisabledByDefault"=dword:00000000
"Enabled"=dword:00000001

[HKEY_LOCAL_MACHINE\SOFTWARE\Microsoft\.NETFramework\v4.0.30319]
"SchUseStrongCrypto"=dword:00000001
And if you want to disable old cyphers read the following article.
Active Directory Service Account (gMSA)
Azure AD Connect Server need two accounts to run. One account to start the local Windows service and another account to read and write directory object attributes back to the Active Directory.
I prefer for the first account a group managed service account because we do not have to take care of the password of this user. Active Directory will manage the password of the account.
Source: gMSA
On the server where you want to install the Azure AD Connect service, Install the necessary Active Directory tools with PowerSHell:
Install-WindowsFeature -Name RSAT-AD-PowerShell,RSAT-ADDS -IncludeAllSubFeatureFor gMSA you need to have a Microsoft Key Distribution Service root key “KDS root key” in Active Directory, check if KDS root key is already present:
Get-KdsRootKeyIf this command does not get any output, you have no KDS root key and you have to create a new one. But take care, when creating a KDS root key, it took 10 hours before you can use the root key. if you want to use it immediately, you can use this command to have direct access to the key.
Add-KdsRootKey -EffectiveTime (Get-Date).AddHours(-10)Source: Create the Key Distribution Services KDS Root Key
Now you can add a new gMSA account to use it as the service account for Azure AD Connect.
 # Computername
$ServerAADc = 'NetBIOS name of Server'

# Create the Key
New-ADServiceAccount -Name '_gMSA-AADC' -PrincipalsAllowedToRetrieveManagedPassword ('{0}$' -f $ServerAADc) -DNSHostName ('{0}.{1}' -f $ServerAADc, (Get-ADDomain).DNSRoot)
If this command was executed successfully, you have to activate and Test the newly created gMSA account directly on the machine where you want to use the gMSA account..
# Install Service account on AAD Connect server
Install-ADServiceAccount -Identity _gMSA-AADC$

# Test Service Account and get account password
Test-ADServiceAccount -Identity _gMSA-AADC$
Response = True
Active Directory Synchronization Account
The Active Directory synchronization account is used to read the Active Directory forest, this account must have permission to read and write user, group, contact and inter org person attributes. A detailed view of permission, later in this document.
Create a new User for Identity synchronization and note the password for this user, you need this password later and it is a good idea to save this username and password in your password safe.
Password safe:
# Define the account name for Active Directory synchronization
$AccountName = '_srv-ADDSEntAdm'

# Define the ou where you want to place the new account
$OUservice = 'OU=Service,OU=Company,DC=corp,DC=contoso,DC=com'

# Load assembly to generate a random password
$null = [Reflection.Assembly]::LoadWithPartialName("System.Web")

# Generate the password
$AccountPasswd = [System.Web.Security.Membership]::GeneratePassword(64,0)

# Write the password to PowerShell console
$AccountPasswd

# Convert the password as secure string
$AccountPasswd = $AccountPasswd | ConvertTo-SecureString -AsPlainText -Force

# Create new AD User for AAD Connect
New-ADUser -Name $AccountName -SamAccountName $AccountName -DisplayName 'AD DS Enterprise Administrator' -Path $OUservice -AccountPassword $AccountPasswd -Enabled:$true
Note: Change the following variables: $AccountName and $OUService
This PowerShell script creates a user in the given organizational unit and uses the dynamic password from the script. The user is a standard user without any special Active Directory permission or group memberships.
Install Azure AD Connect
To install the latest version of the Azure AD Connect Download Latest Version.
The next section describes the requirements to install the service and defines the requirements for the Active Directory accounts need for the service.
Requirements:
- Azure Tenant
- Domains: Internet routable domains must be configured in your tenant
- UPN Suffixes in Active Directory must be configured
- Identity cleanup in every Active Directory forest must be done, see Idfix
- Check the number of objects that you want to sync with Azure AD, the limit is 50k objects but can be increased by Microsoft support
- Active Directory forest functional level must be Windows Server 2003 or later. If you plan to user password writeback, forest functional level must Windows Server 2008R2 or later
- Writable Domain Controller must be used from Azure AD Connect service
- It is not supported to have dotted NetBIOS Domain names in the forest you plan to synchronize
- Active Directory recycle bin enabled
- The Azure AD Connect server must have a full GUI installed
- Windows Server 2008R2 or later
Source: Prerequisites for Azure AD Connect
Requirements for service and sync accounts:
- On-Premises Account
- Domain Admin when installing express installation.
- Local Admin and Domain user, when installing custom installation and using gMSA and synchronization account.
- Domain Admin, when installing custom installation but let the setup process create the necessary accounts for you.
- Office 365 Global Admin
- If you plan to make Exchange Hybrid installation, extend the Active Directory with Exchange Schema before installing AAD Connect
Start installation
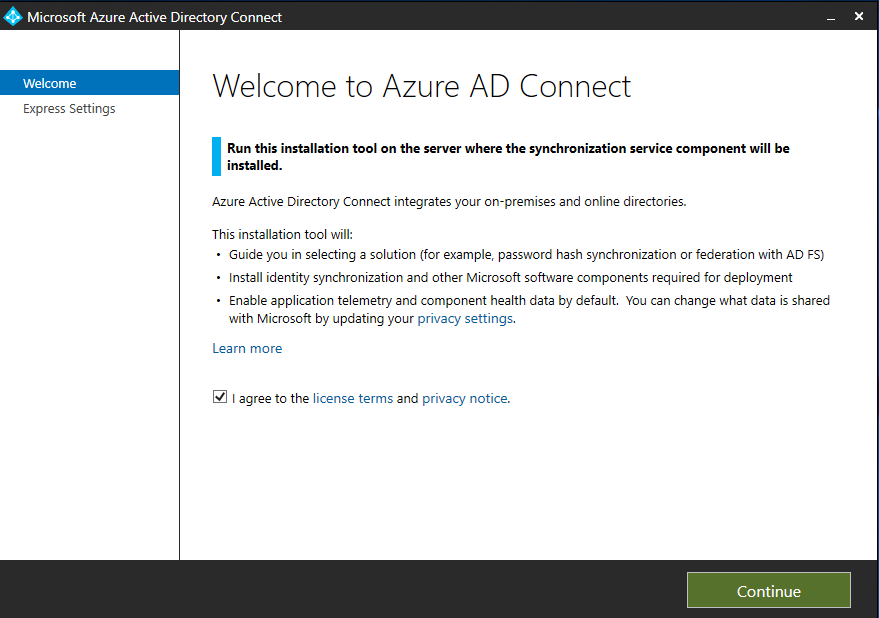
Start installation after you download the executable.
Start Customized installation by clicking the “Customize” button. It is only possible in the “Customize” mode to select the existing gMSA and Active Directory synchronization account.
Info: AAD Connect custom installation
Note: If you “use express settings” mode:
- No gMSA account is used to start the ADSync service
- Active Directory synchronization account will be automatically created and this account will get too much Active Directory right.
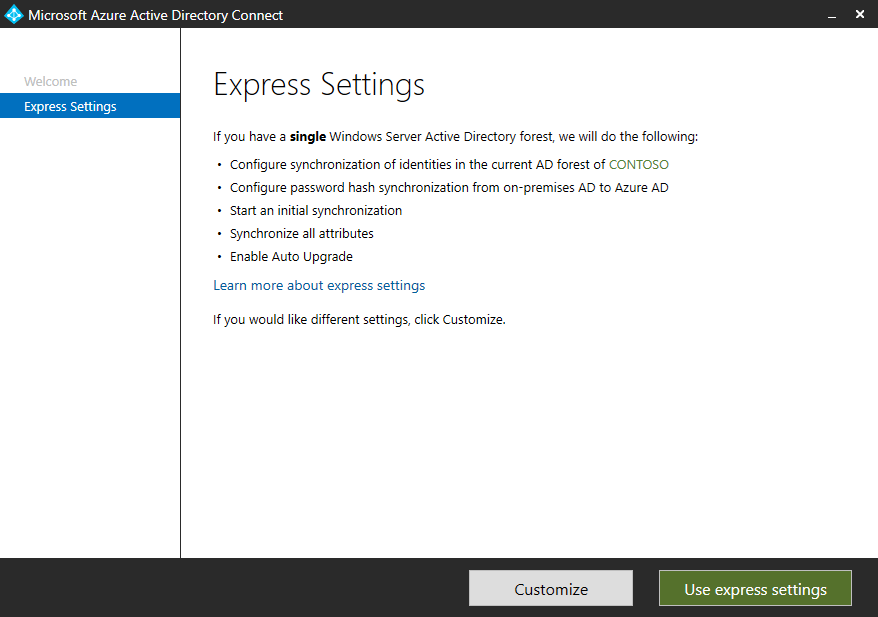
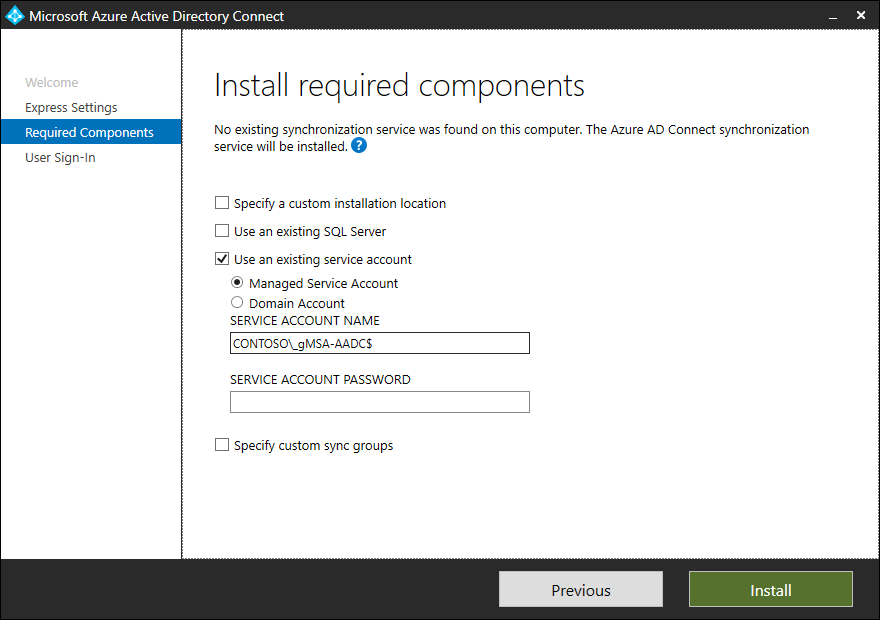
We have created a gMSA account earlier, please use this account here and take care of the dollar sign character “$” at the end of the account name.
The next section will ask you the user sign-in method you want to use. I have prepared a list with all links, so you can read through every method and then select the method of your choice.
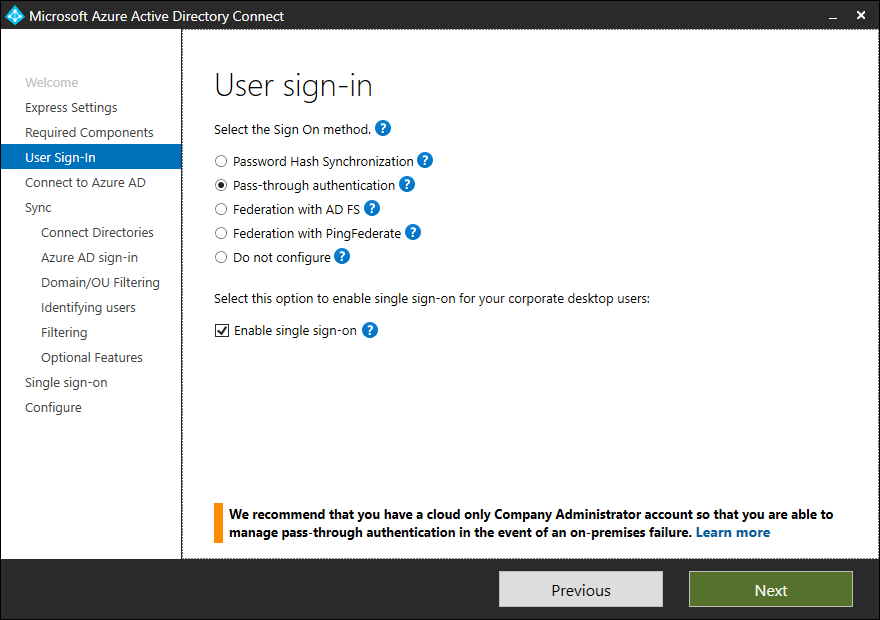
Short description of sign-in methods
| Single Sign-On option | Description |
|---|---|
| Password Hash Sync | Users are able to sign in to Microsoft cloud services, such as Office 365, using the same password they use in their on-premises network. The user’s passwords are synchronized to Azure AD as a password hash and authentication occurs in the cloud. See Password hash synchronization for more information. |
| Pass-through Authentication | Users are able to sign in to Microsoft cloud services, such as Office 365, using the same password they use in their on-premises network. The user’s password is passed through to the on-premises Active Directory domain controller to be validated. |
| Federation with AD FS | Users are able to sign in to Microsoft cloud services, such as Office 365, using the same password they use in their on-premises network. The users are redirected to their on-premises AD FS instance to sign in and authentication occurs on-premises. |
| Federation with PingFederate | Users are able to sign in to Microsoft cloud services, such as Office 365, using the same password they use in their on-premises network. The users are redirected to their on-premises PingFederate instance to sign in and authentication occurs on-premises. |
| Do not configure | No user sign-in feature is installed and configured. Choose this option if you already have a 3rd party federation server or another existing solution in place. |
| Enable Single Sign on | This option is available with both password hash sync and pass-through authentication and provides a single sign-on experience for desktop users on the corporate network. See Single sign-on for more information. Note for AD FS customers this option is not available because AD FS already offers the same level of single sign-on. |
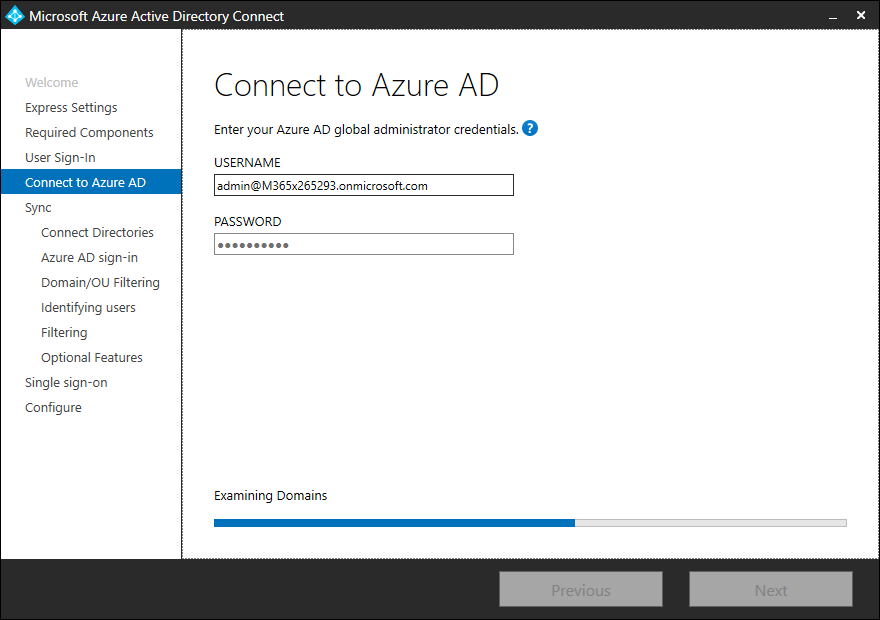
Here we need a Global Admin from your tenant because the setup process will create a user object in AzureAD.
In this section, you are able to connect every Active Directory forest that you want to have synchronized with your tenant. Type the Active Directory forest name in the textbox and click “Add Directory”, then type in the credentials from the forest to connect to the Active Directory.
Note: The credential that you use to connect to the Active Directory forest must have permissions in the target forest to synchronize and update the Active Directory objects. I describe the needed permissions later in this article.
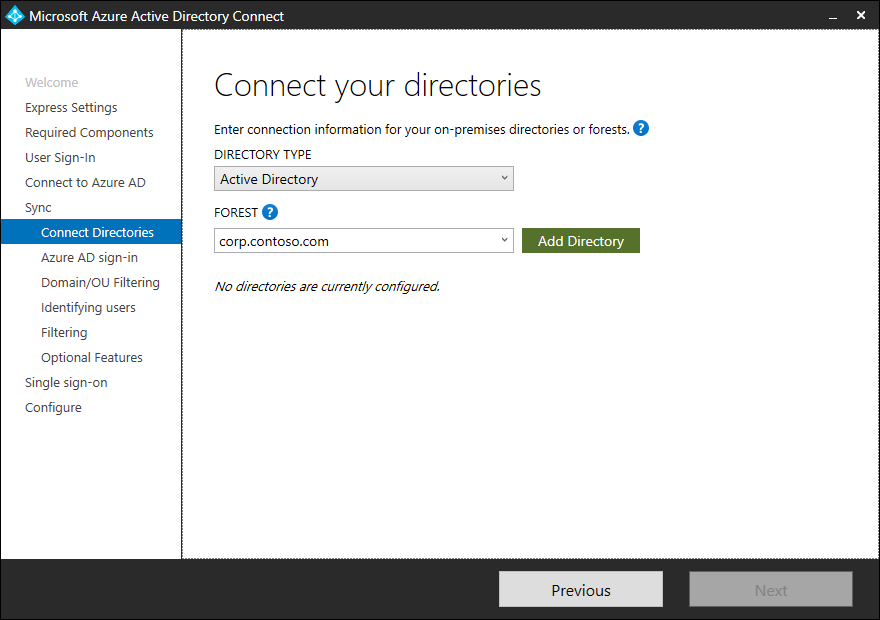
After entering the forest name and clicking Add Directory, a pop-up dialog appears and prompts you with the following options:
| Option | Description |
|---|---|
| Create new account | Select this option if you want Azure AD Connect wizard to create the AD DS account required by Azure AD Connect for connecting to the AD forest during directory synchronization. When this option is selected, enter the username and password for an enterprise admin account. The enterprise admin account provided will be used by Azure AD Connect wizard to create the required AD DS account. You can enter the domain part in either NetBios or FQDN format, that is, FABRIKAM\administrator or fabrikam.com\administrator. |
| Use existing account | Select this option if you want to provide an existing AD DS account to be used Azure AD Connect for connecting to the AD forest during directory synchronization. You can enter the domain part in either NetBios or FQDN format, that is, FABRIKAM\syncuser or fabrikam.com\syncuser. This account can be a regular user account because it only needs the default read permissions. However, depending on your scenario, you may need more permissions. For more information, see Azure AD Connect Accounts and permissions. |
After you add an Active Directory forest, the forest will be shown below the “Connected Directories” as connected, repeat this task for every Active Directory forest you want.
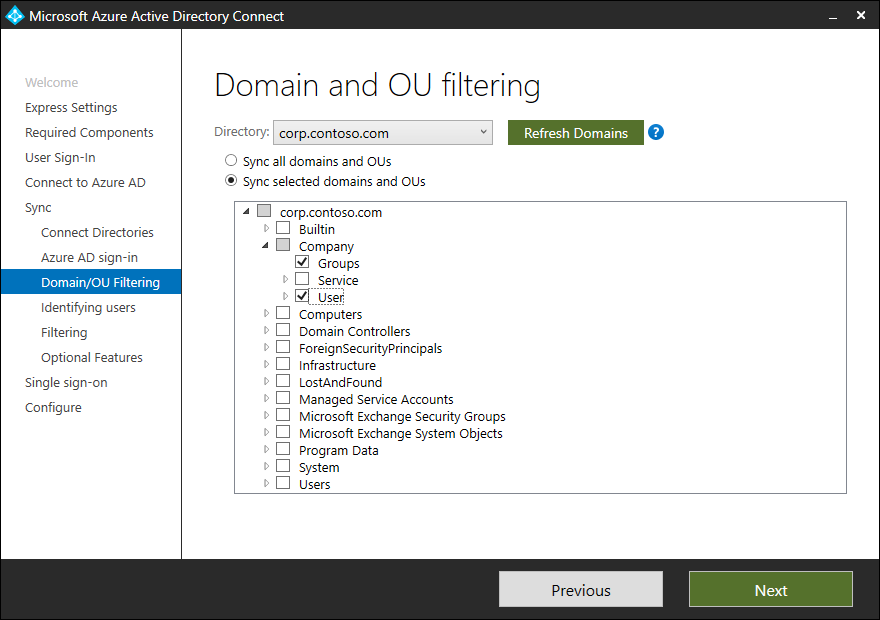
For each Active Directory forest that you connect, select the organizational units that you want to synchronize. Understand the type of select boxes:
- Select box is grayed out, means there are select boxes activated below
- Select box is white, nothing is selected
- Select box is checked, this and all sub organizational units are selected and organizational units that will be created afterward automatically selected.
Uniquely identifying your users
Select how users should be identified in your on-premises directories
The Matching across forests feature allows you to define how users from your AD DS forests are represented in Azure AD. A user might either be represented only once across all forests or have a combination of enabled and disabled accounts. The user might also be represented as a contact in some forests.
If you have an Active Directory forest design with account and resource forest, and you use Exchange in the resource forest, and you work with linked mailboxes, then you have to select the following option “ObjectSID and msExchangeMasterAccountSID/ msRTCSIP-OriginatorSid” to match mailbox users and linked users and merge this account before synchronizing this account to Azure AD.
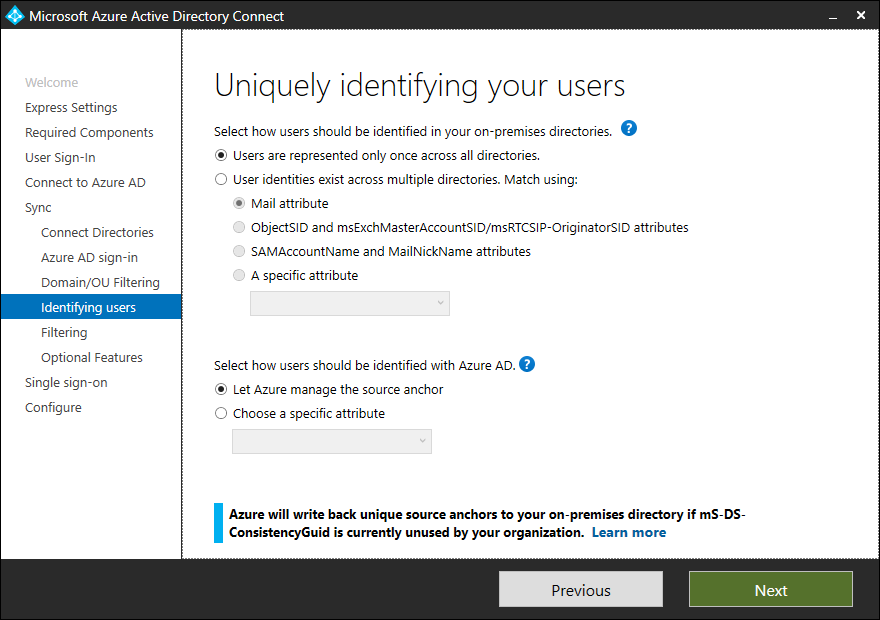
| Setting | Description |
|---|---|
| Users are only represented once across all forests | All users are created as individual objects in Azure AD. The objects are not joined in the metaverse. |
| Mail attribute | This option joins users and contacts if the mail attribute has the same value in different forests. Use this option when your contacts have been created using GALSync. If this option is chosen, User objects whose Mail attribute aren’t populated will not be synchronized to Azure AD. |
| ObjectSID and msExchangeMasterAccountSID/ msRTCSIP-OriginatorSid | This option joins an enabled user in an account forest with a disabled user in a resource forest. In Exchange, this configuration is known as a linked mailbox. This option can also be used if you only use Lync and Exchange is not present in the resource forest. |
| sAMAccountName and MailNickName | This option joins on attributes where it is expected the sign-in ID for the user can be found. |
| A specific attribute | This option allows you to select your own attribute. If this option is chosen, User objects whose (selected) attribute aren’t populated will not be synchronized to Azure AD. Limitation: Make sure to pick an attribute that already can be found in the metaverse. If you pick a custom attribute (not in the metaverse), the wizard cannot complete. |
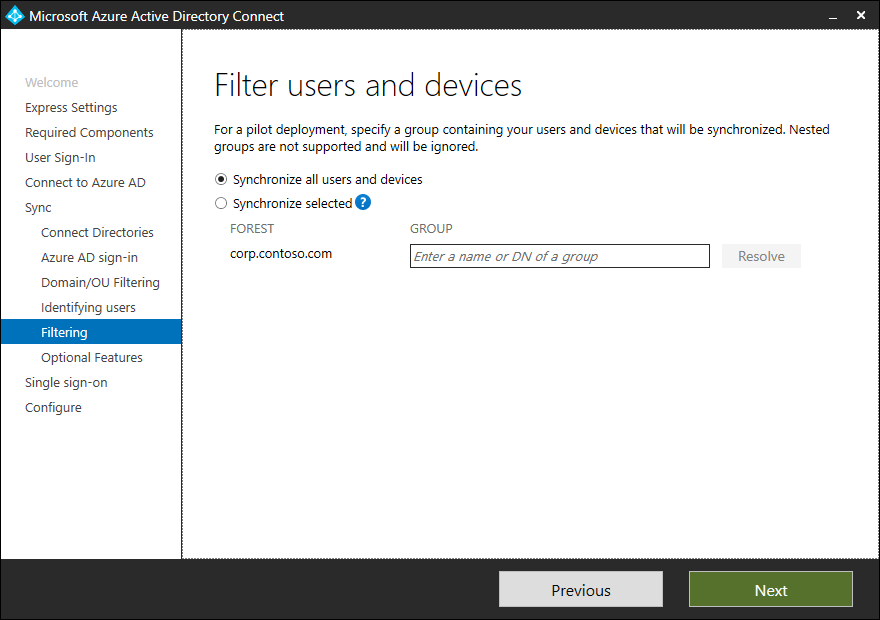
Note: Filtering Active Directory objects based on group memberships is only supported in test environments.
If you have an Exchange Organization deployed in one of the Active Directory forests that you want to connect, activate Exchange hybrid deployment. If you do not select Exchange hybrid deployment, the attribute schema for Azure AD connect service will not have all attributes and a merge of user objects can not run.
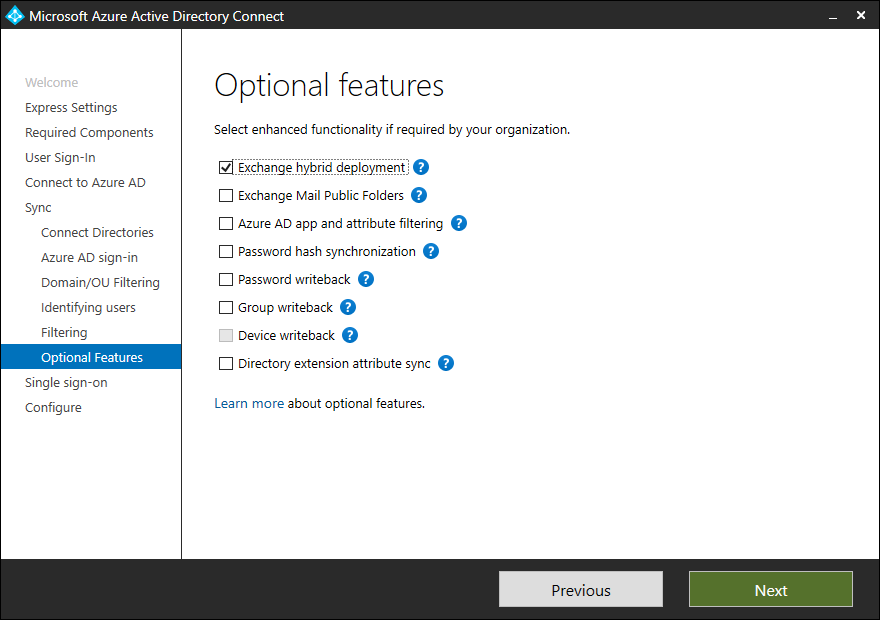
Each point can be read in the list below.
- Exchange Hybrid deployment
- Exchange Mail Public Folders
- Azure AD app and attribute filtering
- Password hash synchronization
- Password writeback
- Group writeback
- Device writeback
- Directory extension attribute sync
If you want to use Single sign-on with your on-Premises user accounts enable this option.
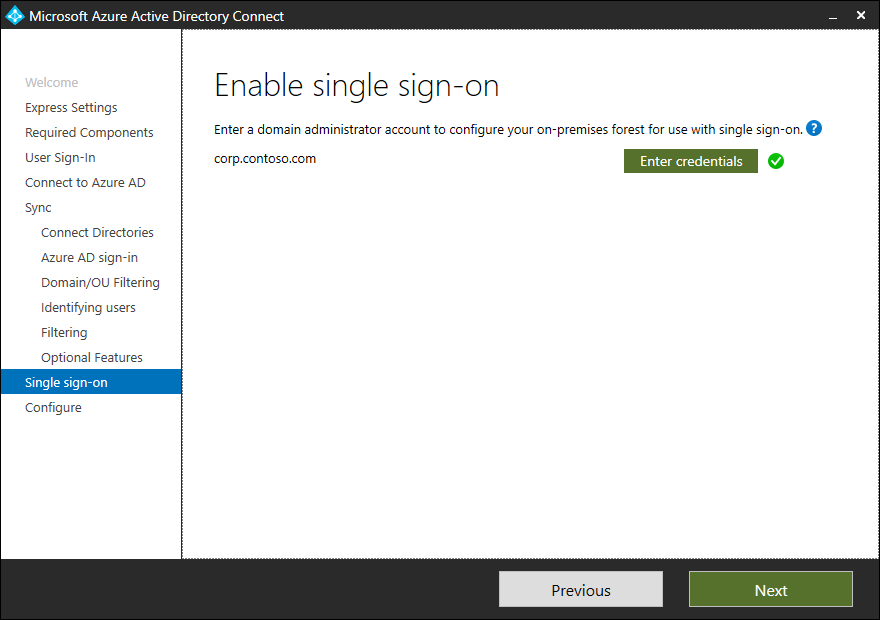
Info: Azure Active Directory Single sign-on
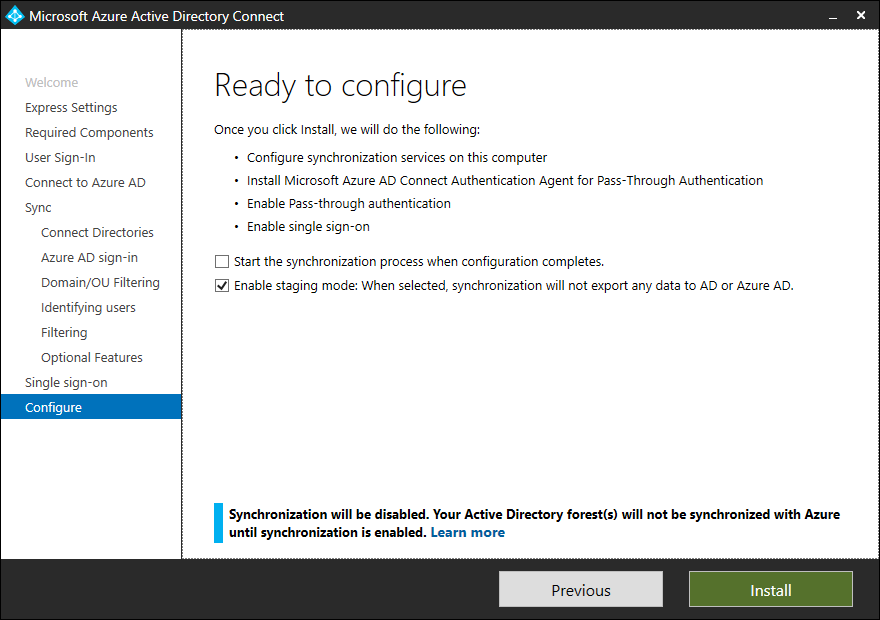
Now you are ready to install the service, but take care that you disable “Start the synchronization” and “enable Staging mode”.
- Disable Start synchronization: At this moment the synchronization account do not have rights on the Active Directory objects so the synchronization will fail!
- Enable Staging mode: This mode read the Active Directory objects and synchronize with the Metaverse but will not push the objects to Azure AD
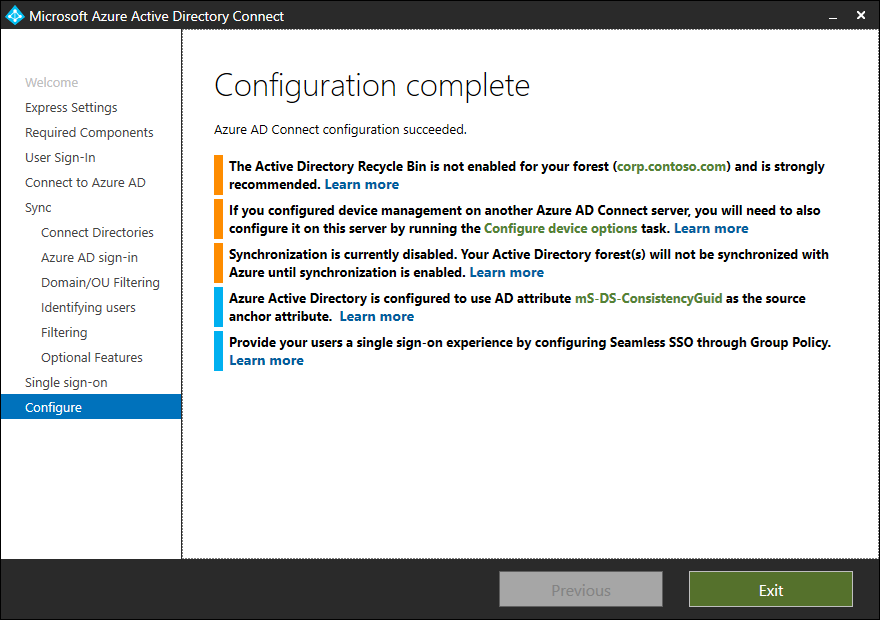
The configuration is finished and shows a screen with information for you.
Assigning permissions to the Synchronization account
After you install the Azure AD Connect sync service you have to assign the right permission to all the Active Directories you connect. Since the end of the year 2018, Azure AD Connect brings a PowerShell Module, this module can be used to finly assign permissions.
Info:
Take care with dealing with the permissions and go forward with this principle: As few rights as possible and as many rights as necessary
Good to know
After installing Azure AD Connect sync service, a user object in Active Directory will update the attribute: mS-DS-ConsistencyGuid
When activating Exchange hybrid deployment, a user objects that have enabled mailboxes will get a new X500 value in proxyAddresses and the attribute msDS-ExternalDirectoryObjectId will get a value.
Example: x500:/o=ExchangeLabs/ou=Exchange Administrative Group (FYDIBOHF23SPDLT)….